I may have said this before, but now seems like a good time to say it again. I am pie challenged and I use frozen pie crust (not the ones that come in a pan, rather, the flat ones). I came up with what I call " a cook's apple pie". Fried apples with disks of pie crust baked like cookies only takes 15 minutes to cook, far less time than a traditional pie. I find this style of "pie" can go from rustic in a small canning jar, to comforting over a bowl of vanilla ice cream, to contemporary arranged just so on a small dessert plate with an artfully placed drizzle of caramel sauce. It is important to note that if you save your scraps from other pies, or even from making a big batch of these "pies", you can easily adjust this recipe for single servings. When making a single "pie", I just use the very scientific measurements of "small pinches" for the spices.
Deconstructed Apple Pie
2 Frozen pie crusts, thawed
8 apples, cut into 1/2 inch cubes
1/2 cup sugar, plus extra for sprinkling
2tsp cinnamon, plus extra for sprinkling
1 tsp cloves
1/2 cup water
2tbsp butter
Preheat your oven to 350 degrees (f). Place the pie crust flat on a cookie sheet and cut out 2 inch rounds using pastry rings, running a paring knife around the rim of a drinking glass works well for this or really any 2 inch shape. I used an apple shaped cookie cutter. Remove the "scraps" and re-wrap them for a later use, or if you didn't quite get 8 rounds out of your dough, make a couple more from the scraps. Sprinkle the dough with cinnamon and sugar to your liking. Bake the crusts for 15 minutes or until golden.
Meanwhile put the apples, measured sugar, measured cinnamon, cloves water and butter into a large frying pan. Let it cook over medium heat until the apples are fork tender, the liquid has thickened and coats the apples.
Divvy up the apples into 8 servings. Your crusts should be done just as you are spooning out the final portion of apples. Use a spatula to place your crusts on top of your apples, and voila! Homemade apple pie!
A song with the word "Golly" in the title has to be appropriate when apple pie is involved! But just as the pie is deconstructed, just a little disheveled, so is the situation described in the song...
One of my favorite lines from Twin Peaks is of course food related. "Nothing beats that taste sensation when maple syrup collides with ham!" Really though, you could use any salty meat..sausage, bacon. It's all about the salty/sweet. This dish speaks to the season, is super easy and only has three ingredients! Carrots and other root vegetables that usually store energy as starch, convert it into sugar as a sort of antifreeze when cold weather hits taking them to the peak of their sweetness and flavor. When I made these for the first time, the sweet maple and carrots with the smokey bacon filled my kitchen with the cheery smell of winter. You know, the smell of sweets baking and fireplaces blazing...It's just wonderful. You might up the charm of this dish by adding replacing some or all of the carrots with parsnips.
Maple Bacon Roasted Carrots
2lbs carrots
3 tbsp maple syrup
4 pieces of good quality bacon
Preheat your oven to 400 degrees (F). Line a shallow baking pan with foil (maple syrup burns and is sticky stuff...it will ruin your pans in you try to cook it straight on the pan). Peel the carrots, cut off the tops and trim off the ends. Cut the carrots into quarters to form sticks (as you can see in the photo). Lay out your carrot sticks in the baking pan. In a frying pan, render the fat of your bacon by cooking it over medium-low heat. Cook it until it's quite crispy. You really want a lot of liquid fat, 2 tbsp worth. Remove the bacon from the fat and let it cool on a paper towel before crumbling and setting it aside. Pour the bacon fat and the maple syrup over the carrot sticks, making sure they are all evenly coated. Bake for 30-35 minutes or until the carrots are nice and tender. Sprinkle the bacon rubble over the carrots and serve! EASY BREEZY!
This year for my birthday, I did not make anything special with the cake...just yellow cake with "funfetti" (stir in jimmies to any light colored cake batter for a festive flecking of color). The frosting, on the other hand, was a luxurious tasting Nutella butter cream! It was very easy to make and "poshed up" the cake quite nicely. I'm sorry, there are no photos of my cake, but for the record, it just looks like fluffy chocolate frosting. I'm going to give you a small amount based on how much stuff you need, per stick of butter. But you'll probably be better off with 1.5x as much as this recipe makes for a two layer 9-inch cake. This frosting is good for those, like myself, who don't like frosting that is too sweet.
Nutella Butter Cream
1 stick (1/2 cup) softened, unsalted butter
1/2 cup Nutella
1 tsp dutch process cocoa
Whip the butter in a mixing bowl using an electric mixer. When it is smooth add the Nutella, and cocoa. Whip until thoroughly combined, and frost your cake! This is so easy, it's almost not a recipe!
Turning 25...it's kind of like that. (Except Rebecca Black is NOT invited.)
This year, for Thanksgiving I parted with tradition and had a very pared down meal. Instead of cooking a turkey and entirely too many side dishes, Brad and I had a light dinner that centered around cod! I used ingredients that echoed the flavors of my mom's turkey recipe, and it turned out great. Hey, if cod was good enough for the first Thanksgiving at Plymouth, it's good enough for my table, too! It was, as my Grandma Kathie said, "Very New England." I have to tell you, this recipe is so quick and easy, it could work for a week night dinner!
Thanksgiving Steamed Cod
1 tsp olive oil
1/2 an onion
1/2 an orange
1 sprig of fresh sage
4 individual sized cod fillets (adds up to about 1.5 lbs)
salt and pepper
1/4 cup white wine or light broth
When splitting the onion to make the 1/2 onion called for in the ingtredients, cut from pole to pole, not around the equator. Slice the half onion thinly into arches, chopping again, from pole to pole. Cut the 1/2 orange into 1/4-inch slices, reserving the smaller discs and the "nub" to squeeze juice over the fillets later.
In a large frying pan, heat your oil on medium heat. Add the onions. Sprinkle a little salt over them to encourage them to throw their juice to add to the liquid for steaming. Next layer the oranges and the sage on top of the onions. This is all going to make a nice flavorful bed of steam for the fish. Generously salt and pepper your fish fillets before placing them on top of the bed of produce. Cover and cook for about 2 minutes. By 2 minutes, it should look like your onions are making some progress. Pour the wine (or broth- something light like chicken broth or fish stock) over the fish. Return the lid and steam for 5 minutes more. You'll know the fish is done if it is flaky. Be careful not to over cook it, or it will be rubbery and dry.
I did not eat the onions or oranges...but I don't see why you couldn't pull the oranges and sage out, and continue to cook the onions down into a nice relish or something like that, if you have the time.
I came up with the filling after fiddling with a cream of mushroom soup recipe my Aunt Lorraine sent me.
Just some words of advice before you start: It is of the utmost importance to have all your chopping and measuring done before you start cooking. It really makes things a lot easier. Also, when I say to add the broth slowly while stirring constantly for the gravy, I mean it. If you just dump the broth in all willy-nilly without stirring, you will end up with clumps of flour floating in chicken broth. Actually, adding the broth is a great task for a junior assistant. If you don't have one on hand (like me) it is possible to do it on your own, but be warned that if you don't ever make gravy with an assistant the long and glorious tradition of beautiful gravy may end with you. I don't think it's possible to learn the art of gravy making without first assisting one who has mastered it. I'll do my best to explain it here, but I encourage you to take advantage of any opportunity to experience the benefits of a mentor/disciple relationship presented to you, especially when it comes to making gravy.
Chicken Pot Pie
1 large boneless, skinless chicken breast, 1/ 2 inch cubes
1 potato, 1/4 inch cubes
1/2 medium onion, chopped into 1/2 inch pieces
4 tablespoons butter, divided
1/4 cup flour
2 cups chicken broth
1/4 cup milk
1 cup frozen vegetables*
Salt & pepper to taste
1 frozen pie crust, thawed
In a medium pot, over medium high heat, melt 2 tbsp butter. Add the chicken breast to the butter and brown the meat. Season the chicken with a bit of salt as it is cooking. It should take the chicken about 2 minutes to brown completely on the outside. It doesn't have to be cooked all the way through, because you'll be cooking it further later. Taking care to leave behind the butter and juices of the chicken, remove the meat from the pot and set it aside.
Add the remaining 2 tbsp of butter to the pot and reduce the heat to medium low and add your onion and potato. Season with a little more salt (just to get the onion to throw its juices). Cook and stir occasionally until, the onion is turning translucent and is soft, about 3 minutes. Then sprinkle your flour over the potatoes and onions and cook for 2 minutes stirring constantly.You're making a rue, so it will look sort of like a paste when you're ready to add the broth. S l o w l y add the chicken broth to the mixture while stirring constantly, until the liquid thickens a little to what looks like a nice consistency for chicken pot pie. <-- I know that's vague, but you'll know it when you see it.
Add the chicken back to the pot, along with the frozen veggies. Then add the milk and put it over low heat until it comes to a simmer (NOT a boil). Season with salt and pepper to taste.
If you want you can stop here and enjoy a lovely cream of chicken soup...
OR
After you have chopped the veggies and meat but before you've added your butter to the pot, preheat the oven to 375 degrees (F). Place a 9-inch cake pan on a cookie sheet. Put the soup in the cake pan (you think it won't all fit, but it does). Lay the pie crust over the soup and seal the edges. Put the pie (cookie sheet and all) into the oven and bake for 35-40 minutes, until the crust is golden, brown and delicious. The cookie sheet is imperative because the filling that will be seeping out is capable of burning through an oven mitt...as evidenced by the one we just threw away.
Let the gravy stop boiling before serving, unless you want to risk pie explosion upon breaking the crust.
ENJOY!
* I used a bag that came with a mix of peas, carrots, corn and green beans. I think it helped to have the small pieces rather than something large, like broccoli.
It was a gray and rainy day, so I retreated to the dry warmth of my kitchen to make use of the many, many apples my fiance and I picked last weekend to celebrate the beginning of Fall! In an effort to take advantage of my fresh, crisp, juicy bounty I neglected to eat my bananas before they were too mushy to be good for anything other than banana bread. So, inspired by the childhood song, I made apple-banana muffins. But I didn't want them to turn out a heavy, cliche of fall, so I added caraway to the spice profile of my muffins. It brings out the tartness of the apples among the sweetness of the bananas, the warmth of the little bit of cinnamon and nuttiness of the whole wheat flour. I tested these muffins out on my classmates with great success, so I think it's an experimental recipe worthy of le blog!
Apple-Banana Muffins
1/2 cup unsalted butter, softened
1-1/4 cups sugar
2 eggs
1/2 cup milk
1 tsp apple cider vinegar
1-1/4 cup whole wheat flour
1 -1/4 cup all purpose flour
1 tsp baking soda
1 tsp salt
1/2 tsp cinnamon
1/4 tsp ginger
1/4 tsp cloves
1/4 tsp caraway seeds
1 apple, peeled cored and diced into 1/2 inch chunks
2 very ripe bananas, smash/sliced with a fork
First a little prep work: Preheat your oven to 350 degrees (f). Grease or line your muffin tins (this makes 12 muffins). Peel, core and dice your apple. Finally, combine the milk and vinegar, let it sit and curdle. <--sounds gross, but think of it as homemade buttermilk!
While the milk is doing its thing, cream the butter and sugar in a large mixing bowl for 2 minutes on medium speed. Add the eggs and mix on medium speed until the mixture is fluffy. Switch to a wooden spoon and add the "sour milk". In a smaller bowl, combine the flours, baking soda, salt, cinnamon, ginger, cloves, and caraway. Add the dry mix to the wet and stir to combine. Finally stir in the apples and bananas.
Portion out batter among the 12 muffin tins, and bake until the muffins are golden and spring back when you poke them (about 25-30 minutes).
If you used liners, you can carefully remove the muffins from the tin onto the cooling rack. If you did it old school, like me, wait about 5 minutes before GENTLY coaxing the muffins out of the pan. I usually turn the pan upside down with one hand and wiggle the edges of the top of the muffins with the other until they finally drop out.
Happy fall!
P.S. Don't have any cider vinegar? Use 1/2 cup buttermilk, sour cream or plain yogurt instead!
Um...not much to say about this song except, "YES.YES. YES."
This recipe is based on the Rice Krispies Treat method, so it's extremely easy and quick. It's great if you're going to a Halloween party, or you want to get in the kitchen with kids...or if you want a sweet, but it seems like to much to actually bake something. Since this was my first time making these I didn't put any extras in there, but after tasting them, I think these would do well with dried cranberries, chopped nuts, M&Ms, Reese's Pieces, pretzels, or if you want to get all gourmet, vanilla beans, cracked espresso beans, or bacon bits to balance out the sweetness...the possibilities are endless.
Caramel Popcorn Bars
2 tbsp oil
1/2 cup popcorn kernels
1/2 cup unsalted butter
1 tsp salt
1/2 cup brown sugar
1- 10 oz package of marshmallows (the big ones)
**This is a two person job, so recruit a friend!
Heat the oil in a medium pot over medium heat.Place 3 kernels in the oil. When one of them pops you'll know the oil is hot enough to add the rest of the kernels. Shake the pot frequently to help distribute the heat, prevent burning, and once the corn starts popping, to get the un-popped kernels to the bottom of the pot. You'll know it's done when the popping slows down and the pot looks nearly full. Be careful not to burn it! When your popcorn is done dump the pot out into a large bowl and set it aside.
Now would be a good time to line a shallow, small-ish baking pan (like a 9-inch cake pan) with aluminum foil. Grease VERY WELL with butter and set it aside.
I just used a wadded up paper towel to get the kernel shells and popcorn bits out before creating my goo in the same pot -which was oiled from the popcorn and also is NON-STICK!
I turned the heat to medium low and melted my butter and brown sugar, stirring constantly. Do this until the mixture bubbles and no longer looks separated. (By separated I mean, the sugar settles to look like sand in a pool of "butter water" if you stop stirring.) This should happen fairly quickly (in a minute or two). Then turn the heat to low and add your marshmallows, stirring constantly until it's mostly smooth. (A few marshmallow lumps never killed anyone...in fact they might enhance the dish!)
Turn off the heat and have an assistant carefully scoop the popcorn out of the bowl and into the pot of goo. Try to shake out any un-popped kernels so nobody breaks a tooth!Carefully fold the popcorn into the goo as they scoop it in, so that the popcorn is coated but is not crushed and mashed. If you want to add extras, now is the time to do it. Once it's all incorporated dump the mass into your greased pan, and do your best to pack it down, but not crush it. I used another piece of greased foil to smash it down with my palms.
Let it cool for about an hour before removing the foil lining from the pan. Set your brick of popcorn on a cutting board and carefully peel the foil away from the sides of the popcorn. Even if some of it sticks,it's okay. Just be patient and gently work the foil away. Use a greased knife or pizza cutter to cut into bars. They're pretty sweet, so I would say smaller is better. (Let's be honest, that's A LOT of sugar.)
They keep for about two days, in an airtight container, with layers of greased foil between stacks of bars, before the popcorn gets unbearably stale.
TIP: clean your dishes right away, with hot water. The hot water helps the goo melt and makes it easier to clean up.
For dinner tonight I made this quick pasta dish ( I feel like I've done a lot of those lately...what can I say? I'm a grad student. It's quick, it's cheap, what do you want from me?) inspired by a baked ziti recipe I saw a few years ago on the Williams-Sonoma website. The original recipe made a sauce from scratch and had whole Kalamtaa olives in it. I highly recommend you make that dish too, but if you're in a hurry this is what you want. I also found that my friends weren't too keen on being slapped with a full bite of olive in the middle of their pasta, even though the olives did wonderful things for the flavor of the sauce. So, I chopped them up and changed their role in this dish from a featured ingredient to something in the background, like a vegetarian anchovy.
The whole time I was putting this together, all I could think was, "If I was a mom, I would totally add this to my regular rotation." So, any parents out there reading, if you try this let me know how it goes. Inquiring non-parent minds want to know! Even if you don't have kids, this one is definitely worth making.
Eggplant Pasta Surprise
1 package of short pasta (I used radiatore)
1 medium eggplant
1 lb italian sausage (I used sweet, but spicy works too)
10 pitted kalamta olives
26 oz jar of your favorite tomato-basil-garlic sauce
optional- 1 /4 cup mozzarella cut into 1/4 inch cubes to melt into the dish at the end
Put on your big ol' pot of water to boil for the pasta.
While you're waiting for the boil, cut your egg plant into 1/2 inch cubes ( I see no harm in cutting them smaller if your kids are REALLY opposed to mystery veggies) and saute them over medium heat in 1 tbsp of olive oil in a large frying pan. Once they start getting translucent and the flesh is going from white to green to brown add your sausage to the pan. If you bought links (like I did), remove the casing before adding the sausage to the eggplant. Once the meat is cooked, drain the fat/excess eggplant liquid and return the pan to the heat. Time for the olives. I'm pretty specific with the olive measurement because those little buggers are intense! You don't want to add too many. Rinse the olives and finely chop them. Add them to the eggplant and meat. Cover it all with the sauce and carefully incorporate all the ingredients. Reduce the heat to low and let it simmer while the pasta cooks.
When the pasta is done drain the noodles and return them to the big ol' pot. Add the mozzarella to the noodles at this time if you're using it. CAREFULLY pour your sauce over the noodles and mix it all up. Dig in!
I feel like this dish is deliciously odd...much like this song!
Apparently the world is going to end soon. We have experienced an earthquake AND are about to endure a tropical storm in Boston within the same week! In an effort to empty our fridge of perishables, Brad and I made these chicken fajitas for dinner last night. I call them Fiery Fajitas after the red and orange peppers, and slight heat on the chicken. I think this recipe would work well with marinated beef or portabello slices too. Just putting that out there. But if you use the beef don't slice it until after it's cooked and rested. Otherwise it will be dry...and that would be the end of the world!
Chicken Fajitas
2 cloves of garlic, crushed
1 tsp chili paste (you can add more if you like it spicier)
zest and juice of one lime
1 tsp cumin
3 tbsp soy sauce
1 tbsp brown sugar
either 1/2 tsp dried cilantro or chopped cilantro to taste
3 boneless, skinless chicken breasts
2 bell peppers (we used orange and red, but you can use any color you have/like)
1/2 large onion or 1 small onion
Tortillas
Make the marinade in a small bowl. Combine the garlic, chili paste, lime zest and juice, cumin, soy sauce, brown sugar and cilantro. Set that aside. Cut the chicken into half inch slices across the breast. In a zip top bag or even a medium container with a lid, combine the marinade and chicken. Let it sit in the fridge for anywhere between 30 minutes and a day.
When you're ready to cook, slice your bell peppers into strips from top to bottom. (You knew to cut around the stem to get the seeds out, and to cut off that white membrane on some of the ribs inside the pepper, right? Good.) Cut the onion in from top to bottom and then slice each half so the slices look like rainbows. Separate the layers of the onions a little so you have "onion strips". Put a little olive oil in a large frying pan and warm it over medium heat. Saute the onions with a pinch of salt (so they throw their juice and make this great glaze for the veggies) until they are just softening and turning translucent. (Here's the part where Brad helped! Hooray!) Add the peppers and really turn up the heat. Stir them frequently but not constantly so you get good caramelization on the onions and a little browning/char on the peppers. The cooking on high heat should take no more than five minutes, or so. Set the veggies aside and cover them with foil to keep them warm.
Return your pan to the heat and cook the marinated chicken on high heat until it is cooked through. It shouldn't take too long for it to be cooked through. Maybe 10 minutes, max.
You can either mix the cooked meat with the cooked veggies, or you can set them in separate containers and set out a buffet of toppings like they do at Chili's with lettuce, tomato, sour cream, guacamole, or whatever. We just had sour cream.
Make sure your tortillas are warm and pliable, pile on the fillings and chow down! :o)
Also, I recommend this song while preparing the dish. Somehow it just amplifies the vibrancy of the flavors, colors and smells!
Hopefully you won't be cooking this amid natural disaster, like we are. But if you are, I recommend listening to this:
I debated for a while on what to call these little rubies, because I wanted to be clear that this was something a little different than the old "strawberries and sugar" deal, but I also didn't want to scare anyone away. If you're feeling adventurous please read on...
I have two cook books that pair strawberries with black pepper. I thought it sounded so crazy that it just might work! So I decided to sacrifice a pint in the name of experimentation. I went with something simple rather than making a whole dessert or ice cream flavor, as recommended in the previously mentioned books. I marinated them and put them on some vanilla ice cream. If you are bored with the usual strawberries and cream, this is definitely the cure! It highlights the punchy brightness of the strawberries at the beginning, and has a nice kick at the end. It almost creates a sensation of effervescence. If you're not feeling quite so adventurous, I think the strawberry/orange combination is quite nice on its own.
Marinated Strawberries
1 pint fresh strawberries
the juice and finely grated zest of one orange
1-2 tsp sugar (to taste, really)
The tiniest pinch of black pepper (also to taste)
Rinse the strawberries, cut of the tops and cut the strawberries into bite sized pieces. Combine in a small bowl with the juice, zest, sugar and pepper. Cover and refrigerate for about an hour.
I ate them on top of ice cream, but I imagine they would be beautiful chopped into a chunky relish and placed on top of some crackers with a swipe of cream cheese. Upon tasting them I have also become obsessed with the idea of putting them on top of a tres leches cake. Please somebody, help me be in a situation where it is necessary to do that.
I have no other explanation for this song selection other than, "this seems appropriate".
It's not that I haven't been cooking and baking. It's just that I've been in a hurry to eat, so I don't take photos, and then I think I can't write a post about what I've just cooked. I'm sorry that I haven't been posting, and I'm sorry that this post has no photos. So I'm making it up to you today by posting two recipes at once.
The first recipe is for some muffins I baked for the research team I have recently joined. I have baked them a couple of times as jumbo muffins for the farmer's market, but I made them as regular sized muffins (my tiny kitchen/oven in Boston is not equipped for jumbo muffins) and the recipe translated quite well! I did try to add white chocolate chips to some of the muffins, but the chips stuck to my pan and broke the muffins in half. So, if you do plan on adding them, I suggest you use cupcake liners, simply sprinkle them on top of the batter before baking, or drizzle melted chocolate once the muffins are baked. Anyway, they certainly don't NEED the chips, but they could benefit from them. Also, this time I skipped the macadamia nuts, but I have included them before and they sure were tasty!
Aloha Muffins
1/2 cup unsalted butter, softened
1 1/4 cups sugar
2 eggs
1/2 cup plain yogurt
1 cup mashed banana
1- 8 oz. can crushed pineapple, drained
1 1/4 cups all purpose flour
1 1/4 cups whole wheat flour
1 tsp baking soda
1/2 tsp salt
1/2 cup chopped macadamia nuts (optional)
shredded coconut for sprinkling on top
Preheat your oven to 400 degrees (f). Grease muffin tin (makes 18 muffins). In a large mixing bowl cream butter and sugar, with a hand mixer on medium speed for about a minute and a half. Add the eggs and blend on medium speed for another minute. Next add the yogurt, bananas, and pineapple until thoroughly combined. In a smaller bowl combine the flours, baking soda, and salt. Pour the dry mixture into the wet and be sure to combine well. Try to get every bit of the wet mixture from the bottom of the bowl, otherwise you'll end up with a couple of really dry muffins and a couple of muffin tins full of melted butter and sugar. Add in the macadamia nuts.
Scoop out 2 generous tablespoons of batter per muffin. Sprinkle the coconut on top of the batter. Put the muffins in the oven and lower the temperature to 350 degrees. Bake for 20-25 minutes or until they are nice and golden. The coconut will become a little golden as well. Of course the true test will be the clean toothpick test.
If you've greased them enough it will be possible to flip out the muffins immediately on to the cooling rack. If they're a little stubborn, wait for them to cool a bit to steam themselves out of the tin and to be less delicate as you gently encourage them out of the tin.
"And now for something completely different..."
I guess I COULD take a photo of our leftover baked ziti...but it's not as pretty once it's been partially eaten and refrigerated. Anyway, last night we had a baked ziti that I pretty much winged. Have you ever noticed that when you get baked ziti from an Italian restaurant it is very simple. No extra veggies or sausage or Tuscan smoked mystery sauces. So, inspired by that simplicity....and my own laziness I came up this huge casserole of pasta and luckily enough it turned out to be delicious!
Baked Ziti
1-1lb box of rigatoni
1-26 oz jar of your favorite marinara sauce
1- 15 oz container ricotta cheese
2 cups shredded mozzarella
3/4 cups freshly grated Parmesan cheese
Preheat your oven to 400 degrees (f). Cook rigatoni according to the instructions on the box for al dente pasta. Spread 1/4 of the jar of marinara sauce in an even layer on the bottom of a large casserole dish. In a medium sized bowl combine the ricotta, 1 cup of the mozzarella and 1/2 cup of the Parmesan. Drain the noodles and return them to their pot. Add the cheese mixture and gently stir to evenly distribute among the noodles. Pour the cheese/noodles into the casserole dish and spread into an even layer. Pour the rest of the marinara sauce on top of the noodles and spread into an even layer. Finally sprinkle the remaining mozzarella and Parmesan on top of the whole thing. Cover with foil if you want gooey cheese and bake for 20 minutes. If you the cheese to brown, remove the foil after the first 10 minutes.
Also, since I've been listening to nothing but this band since I saw them over Memorial Day weekend, here is yet another fantastic tune from Friendly Fires!
Even though school is out for the summer, I'm clinging to what's left of the mild spring weather since so much of this season was rainy this year in Boston. Of course this weekend marks the unofficial start of summer, but there's no need to hurry into summer and cut this season short! This week I was experimenting in the kitchen, and came up with a seasonal pasta salad featuring artichokes and edamame. It's perfect for pot-lucks, picnics and grill outs, because it doesn't have any mayonnaise. I'm just going to let you know now, I found that the spaghetti was a little unwieldy, so in the recipe I'm going to recommend a short pasta even though it's spaghetti in the picture.
Late Spring Pasta Salad
1- 1 lb box rotini cooked and drained
4 oz. finely cubed pancetta
2 cups fresh, shelled edamame beans
1- 8oz. jar marinated artichoke hearts
as much finely grated Parmesan cheese as it takes to make you happy
In a medium frying pan, on medium heat cook the pancetta for about7-9 minutes, or until it's crispy. Add the beans and the artichoke hearts (including the marinating liquid) and cook for 2 more minutes until it's all warmed through. Pour this mixture over the pasta and toss to coat the noodles. Serve with shredded cheese on the side so people can add to their liking.
That's it! You can serve it warm or cold. It's yummy either way!
Do you have any plans for Memorial Day weekend? What are they? I'm going to see these guys in concert on Friday, and I'm REALLY excited!!
Yesterday was such a happy day for so many people in my life! A lot of our friends graduated, it was my aunt's birthday, my cousin's birthday, a family friend went to her prom *AND* Brad and I attended a fantastic wedding celebration! Phew! So much happiness! The wedding reception was a luau themed pot-luck (complete with a tiki piñata!-Aweseome.) so I decided to make a popular Hawaiian snack, Spam Musubi (it's like sushi, but with spam instead of fish), and a cheese dip that my cousin Nicky likes to make, which had come highly recommended from my mom. :o) I will warn you, the Spam Musubi recipe looks long, but that's mostly because I'm describing ingredients that I think many people will find to be foreign and exotic. It's an easy recipe, I promise!
Spam Musubi
3 cups sushi rice
4 cups water
1 can spam
4 tbsp mirin*
2 tbsp soy sauce
5 sheets or yaki nori**
Start by putting the rice into a 2 quart pot. Rinse the rice 7 times by filling the pot with water and dumping it out carefully so you don't spill the rice everywhere. There is a lot of starch on the rice that will just make a gooey film. Not good for sushi. After you pour the water out for the final time, put the measured water into the pot with the rice. Bring the rice to a boil on medium high heat. Then cover it, reduce the heat to medium low, and cook for 20 minutes. Finally, turn off the heat and let it stand covered for 10 minutes before fluffing and cooling the rice so you can handle it.
While the rice is cooling, mix together the mirin and the soy sauce in a small bowl or container, so you can pour it easily. Set that aside
Next prepare the spam by removing it from the can as unmarred as possible. Be patient, and maybe cut out a very small sliver from one of the short sides to release the vacuum, so you can just shake it out of the can. Any way once it's out of the can, slice it in half from top to bottom, making a left half and a right half. Then lay the cut sides on the cutting board and slice each half into 10 even slices making your cuts parallel to what were the top and bottom of the ham. You should end up with twenty 2 inch squares.
Then take your yaki nori and use kitchen shears to cut each sheet into 4 even strips. You'll notice there is a rough side and a shiny side, you want the shiny side facing out once the musubi are done, so just lay the strips in a stack on your work surface with the rough side facing up.
Heat a large frying pan on medium high heat, and lay out 10 of your spam slices in an even layer on the pan. Fry for 2 minutes and then flip them over. Add the soy sauce mixture and slide the spam around to soak up the sauce and to prevent sticking for another minute or two. Once the sauce starts reducing (you'll see it, it happens quickly), flip the spam over again and keep sliding it around until all the sauce is soaked up. Turn the heat off, but leave the spam in the hot pan to continue caramelizing.
Now you're ready to assemble. I usually stir the rice around gently, maybe it's more of a cutting and flipping motion, to release the heat pockets. Once the rice is cool enough to handle, wet your hands (you don't want them dripping, but you want a nice coat of water so the rice doesn't stick to them. Also, do re-wet them in between each musubi) and form the rice into a little round puck, about 2 inches in diameter and an inch thick. You want to pack it tight enough so it will stick together, but not so tight that smash the rice. Place a spam square on top of the rice pillow, and place them spam side down on the center of one of the nori strips. Fold one of the ends of the strip over the disk, and take 3-4 grains of rice from the pot to use it like an adhesive to fold the other end over so it will all stick. Set it on your serving platter with the spam side up. (Like in the photo) and you're done! You have just made one of President Obama's favorite foods! :o)
Nicky's Cheese Dip
A small piece of onion that will result in 1 tbsp when it's finely minced
A small piece of bell pepper that will result in 1/4 cup when it's finely minced
2- 8 oz packages of cream cheese, softened
1- 15 oz can of crushed pineapple, drained well
chopped pecans to taste
Put the onion and pepper in a food processor and pulse until they're in 1/4 inch pieces. Cut the cream cheese into about 3 pieces each, and put that plus the pineapple into the food processor. Process until thoroughly combined.
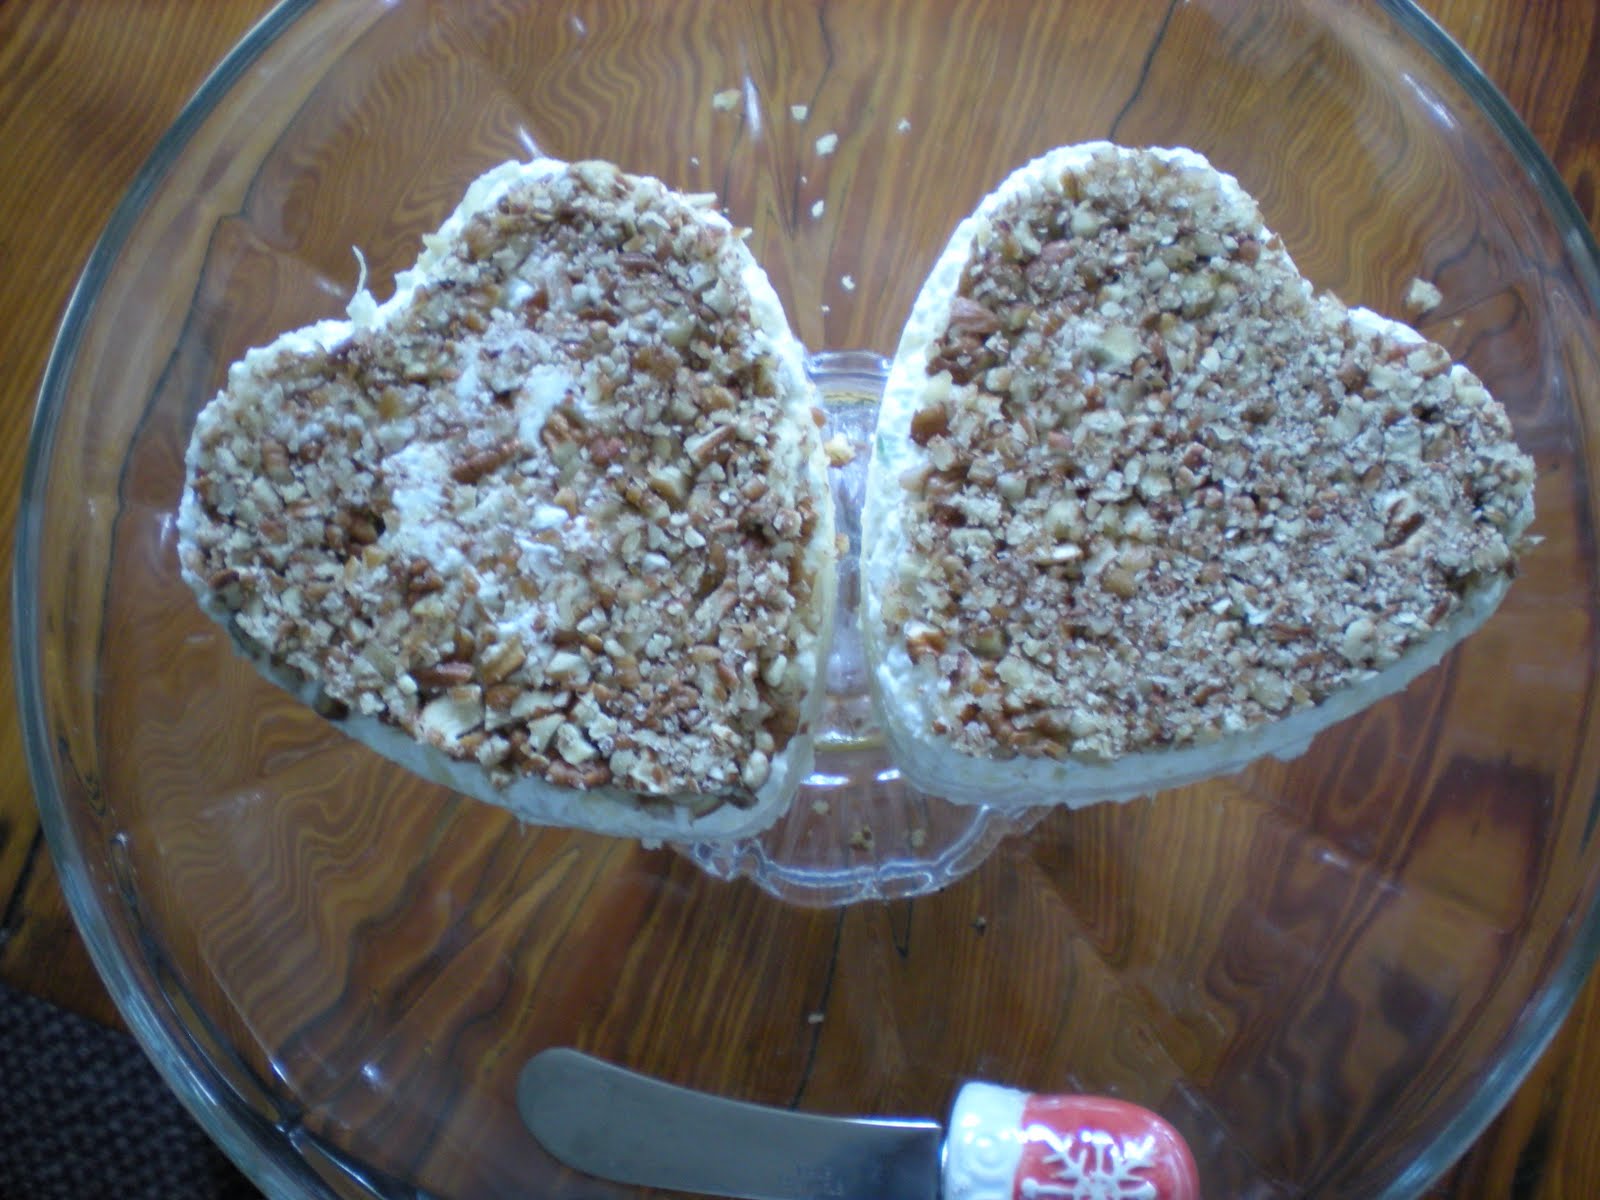
If you have a spring form pan or mold, you can put the pecans in a layer on the bottom. Pack the dip into the vessel, and cover with foil or plastic wrap. Place this in the refrigerator for at least an hour to firm up.
If you don't, just grab some cling wrap, and use it to form a ball with the dip. Refrigerate the ball, which is now covered in the cling wrap for 1 hour. When you're ready to serve it, just roll the ball in the pecans before setting it out.
Or, if you're really in a hurry, just place the soft dip into a bowl and sprinkle the nuts on top.
This is a fairly sturdy dip so it's good for firm veggies, like carrots or sturdy crackers like Triscuits.
I'm not sure what "version city time" is , but I'll venture a guess that it happened yesterday.
* Mirin is a rice wine, similar to sake, but MUCH sweeter. It is usually next to the soy sauce at the supermarket.
** you can get yaki nori at an Asian specialty supermarket. You can get all the other ingredients for this recipe at a specialty market, but they're probably cheaper at the regular supermarket. Anyway, it looks like this:
I've said it before and I'll say it again: I am a sugar ADDICT. Sometimes I feel like it's a chicken and egg problem. Do I love to bake because I'm addicted to sugar? OR, am I addicted to sugar because I love to bake? Brad and I also have a really bad ice cream problem. I think it's something about the ice cream tradition in New England. It's custard based, so it's rich and tasty! And the flavors! Don't get me started. At any rate, I'm trying to curb my cravings by increasing my fruit intake. Enter the smoothie! I've started just popping the fruit I don't get to finish into the freezer when it's just over ripe. This preserves the fruit at it's sweetest. Then on days when I would have ice cream, I whip up this smoothie!
1 cup of frozen fruit, chopped into 1-2 inch pieces*
1/3 cup plain yogurt
1/4 cup milk
Use a blender or food processor to liquefy to the desired consistency. This recipe is rather thick, more like a milk shake than a smoothie. Just add more milk until it's where you like it.
Take your smoothie to a viewing of the sunset and play this whole album from beginning to end. Does it get any smoother than this? I think not.
*The smoothie in the photo is made up of equal parts pineapple, strawberry and banana.
Usually, my fiancé is a chocolate guy but this year he went for something a little different: Carrot cake! I was really excited to make it since we had recently been disappointed by the cake from a very popular bakery, here in Boston. It was almost like eating a doctored up spice cake from a box mix with some carrots added as an afterthought. I grew up with carrot cake that is dense with carrots, pineapple bits, rasins, nuts, etc. To be fair, the cream cheese frosting was on the Boston cake was perfect! Not too sweet and not too heavy. Anyway, I think part of the problem was that we are accustom to the very proud Southern cake baking tradition. As such, my carrot cake has some distinctly Southern flair with pecans as the nut of choice, and the inclusion of shredded coconut. I made cupcakes so they would be easy to share at his office. I hope you'll try them out and let me know how you like them!
Brad's Birthday Cupcakes
3 cups shredded carrots
1/4 cup golden rasins
1 cup sugar
1 cup brown sugar
1- 8 oz. can crushed pineapple, drained
1/2 cup apple sauce
1/2 cup melted butter
4 eggs
1 cup all purpose flour
1 cup white whole wheat flour
1 tsp baking powder
1 tsp baking soda
1/2 tsp ginger
1/2 tsp cinnamon
1 tsp salt
1/4 cup chopped pecans
3/4 cup shredded coconut
Preheat your oven to 350 degrees (f). In a large bowl combine the carrots, brown sugar and sugar. Let them stand for 10 minutes so the sugar can soften the carrots and draw the juice out to make a syrup. Next, add the pineapple, apple sauce, butter, and eggs. Combine by mixing by hand. In a separate bowl combine the remaining ingredients. Pour the dry ingredients into the wet ingredients and mix by hand until it's all fully combined.
Portion out two tablespoons of batter to each lined muffin tin cup. Bake for 25- 30 minutes (I know that's long for a cupcake, but this stuff is DENSE). You'll know they're done when a toothpick comes out clean when you poke the middle of one of the cakes.Remove the cakes from the tins immediately and cool completely (at least 30 minutes) on a cooling rack before topping with your favorite cream cheese frosting. This recipe makes 24 cupcakes. (Or 12 cupcakes and two 6 inch spring form heart cakes that baked for 45 minutes and overflowed all over the oven, but still turned out fine. (o:)
I can't believe how long it's been since my last post! As you all know, school comes first. So this has been moved to the back burner, so to speak.
Today I found two little bananas begging to be made into banana bread. I just couldn't get past the sugar and fat in my go to quick bread recipe. Especially since Brad's birthday is coming up this weekend,and we're behaving in preparation for the cake. (Carrot cake. And yes, I'll be posting the recipe.) I consulted my copy of Healthy Bread in Five Minutes a Day, and I found a banana bread recipe that called for just 1/4 cup of honey as the sweetener for a 2 pound loaf of bread. Perfect! I've made this bread before, and the result is very lightly sweet. The sweetness is so subtle, maybe about as sweet as those Hawaiian dinner rolls at the store. I almost forgot to mention it's egg and dairy free!
All together now: "I can't just leave well enough alone"! So here is my version of Jeff and Zoe's Banana bread baked into buns for convenience.
Multi-Grain Banana Buns
2 cups white whole wheat flour
1 cup bread flour
1/4 cup multi-grain blend*
3/4 tbsp or 1 packet instant dry yeast
1 tsp salt
1/2 tsp cinnamon
-------------------------
1/4 cup honey
1/4 cup neutral flavored oil
3/4 cup lukewarm water
1 cup mashed bananas
In a large bowl combine all the ingredients above the dashed line with a wooden spoon. In a smaller bowl combine all the ingredients below the dashed line. Pour the wet ingredients into the bowl with the dry and mix with a wooden spoon. You might need to add a little more water, about a teaspoon at a time to fully incorporate all the flour. The dough will be pretty sticky. Cover the bowl and let it rise for 2 hours.
Flour a surface to work on. Also dust the dough and your hands. Take the dough and shape it into a ball by pulling the sides under and rotating the mass in quarter turns as you go. Be gentle and quick. I turn the dough with one hand and use my other hand to smooth the dough over, like you would if you were rinsing shampoo from a baby's hair. ( I realize that's a weird description, but that's exactly the motion I was imitating to get the dough smooth.)The whole process should take less than a minute. Use a pizza cutter to divide the dough into 4 equal portions. Then make each quarter into a ball just like the big ball. Cut these into sections into quarters and smooth into balls again.
Grease up you muffin tins and place the dough balls in each compartment. Let it rise for 20 minutes. 5 minutes before the rise time is up, preheat your oven to 375. Bake the buns for 20 minutes.
Remove from the tins immediately and cool on a cooling rack. Voila!
This song is everything the recipe isn't. Well, except that they're both delicious! I think they balance each other out nicely.
P.S. If you really can't stand such well behaved food, these sing with a bit of butter slid in the middle, maybe some reduced sugar preserves, or even a swipe of reduced fat cream cheese. If you're really feeling naughty you might go with:
Nutella
Crunchy Peanut Butter
Honey
Maple Syrup
bonus points for whipping those last two with butter
Cake and champagne is a terribly under appreciated food pairing. But really they are made for each other! They're both celebratory, romantic, indulgent and yummy! I first saw champagne flavored cake a few years ago on Semi-Homemade with Sandra Lee. I tried it with the cake mix, and loved the delicate scent and the divine texture a little bit of bubbly gave the cake. Now that I have matured a bit as a baker, I thought it was about time to figure out how to do this one from scratch. She made the cake with a champagne flavored frosting, which I decided to do this time (Either follow Sandra Lee's recipe, or make your favorite butter cream recipe replacing the milk with champagne). However, usually I prefer a more romantic spin with whipped cream, strawberry halves and chocolate drizzle on top. Either way it's up to you. I wouldn't say no to a fudgey chocolate pan frosting on this one either...
Champagne Cupcakes
1 cup unsalted butter softened
2 cups of sugar
4 eggs
3 cups flour
1tsp baking powder
1/2 tsp salt
1 cup sparkling wine*
Preheat your oven to 350 degrees F and line your muffin tin with paper liners. Now in a large mixing bowl cream the butter and sugar. I use a hand mixer on medium speed for 2-3 minutes. Then add your eggs one at a time, making sure each one is fully beaten in before adding the next. In a small bowl combine the flour, baking powder and salt. Add half of that mixture to the butter/sugar/egg mixture and start on low speed until it won't poof up in your face, and finish combining on medium speed. Then carefully pour in your sparkling wine and mix in again on medium speed. Add the second half of the dry mixture, on (you guessed it!) medium speed. I think I'm a bit generous with cupcake batter, so I only get 22.5 cupcakes, but I'm sure people with more self control can get an even 2 dozen by putting about 2 tbsp batter in each cup. (My scoops of batter are heaping.) I bake them for about 20 minutes. They'll be lovely and pale (unlike most cakes which are more golden when they're done), but when you insert a toothpick or a knife, it will come out clean when they're done. Carefully remove them from the pan as soon as possible, to cool on a rack. Cool completely before frosting.
Channel your inner Marie Antoinette and enjoy!
*I don't actually use champagne, as it seems a waste to ruin all that lovely delicate flavor by baking it in the oven! Instead I use the cheapest sparkling wine I can find. I lucked out this time at Trader Joe's with this great almond flavored one that lent its self quite nicely to baking! And it only cost me $5.99! I also suggest using something on the sweeter side, which is another reason I prefer cheaper sparkling wines for this recipe. Of course when I take that first bite of cake, it might as well be Dom Perignon!
Monday, February 21, 2011
So, my contest didn't work out so well...and response to my poll was minimal. But here are the results: 1 vote each for the two types of cupcakes. So I will make both this coming weekend. Also, I've just heard about the use of palm oil in girl scout cookies, so I'll be posting a recipe for the Samoas too.
Anyway, I have lots to do this week so I'll see you on the flip side!
Eat to the Beat! is the recipient of a Stylish Blogger Award! A big thank you to Christina over at Home Says Hello, and of Eat to the Beat! guest posting fame, for bestowing this honor upon my humble corner of the internet! In order to receive this award I'm required to tell you 7 things about myself and to nominate 15 other blogs. I think I'll save my 7 things for another day and I'm pretty new to the blogging community. So, in order to get to know people, if you have a blog, and would like to be nominated, leave a comment below with a link to your blog no later than 12 am (EST) February 16, 2011. There may be a prize involved for my very favorite blog! If you don't have a blog, I still want to hear from you! I'm putting the next post in your hands, dear readers!
I have a back log of baking ideas, because I've been so busy with school! I can't bake them all, so here is where you come in. Just take a look at the recipe descriptions below, and cast your vote in the poll widget to tell me which recipe you would like to try out for yourself:
Snowball Cupcakes: I am one of ten people nationwide who love Sno Balls . As good as these "edible" treats are, they're out of this world without the excessive amounts of preservatives and artificial ingredients. Also, I have recently learned that New England is the home of Marshmallow Fluff, and I am eager to use it in a recipe!
Milanos: I made these last February at my previous job (Hey, Tracie!) and I have a hankering for them again. High quality chocolate sandwiched between homemade shortbread cookies? YES PLEASE!
Champagne Cupcakes: I was hoping to do this one for Valentine's day, but I'm just not going to have time. Brad is anti-Valentine's Day on the grounds that you should show your love every day. So, on that note, this recipe is in the poll for you to make any time you're feeling romantic...if it receives your vote.
Samoas: Did you know Girl Scout cookies are going for $4.50 a box?? As much as I support girl power, I can only afford a maximum of two boxes a year. My favorite Girl Scout cookie variety is the Samoa (aka Caramel Delight). I feel like I get fewer and fewer cookies every year, and I just gotta have more! (Thin Mints are acceptable, but all you Peanut Butter Patty people can take a hike!) So, I'm making them myself, for those times of the year when it's too cold to park your troop outside the local megamart but you really need that caramel-y, toasted coconut-y, chocolate drizzled goodness.
I apologize for the significant slow in posts. I have had so much work for school lately, I haven't even been cooking a lot, much less blog about it! While I'm cooking less often, I am also cooking smarter. That means meals go for more than one night, and they take less time/effort to prepare. This recipe is inspired by two really great Italian dishes. One is a version of Pasta al Amatriciana that I had in the North End when we were visiting Boston for the first time for the apartment hunt. The other dish is my Aunt Lorraine's Pasta e Fagioli. I sort of amalgamated the two into something super quick, tasty, and inexpensive. Seriously, this took me 20 minutes start to finish. It's almost a non-recipe. Any way. I experimented, I liked it, and I'm sharing it with you.
Penne al Nissa
1 box penne
1 tsp olive oil
1 medium onion
4 oz cubed pancetta (or smoked bacon)
1- 15 oz can cannellini beans, drained
Red pepper flakes to taste
1-18 oz jar marinara sauce
I'll just say to cook your pasta according to the package directions, and just do it as you go. Put your water on to boil, add pasta, drain and return to the pot. This can all be done simultaneously as you build your sauce.
For the sauce, use a large sauce pan, and put your oil over medium heat. Very coarsely chop the onion. Add the onion. After 2 minutes add the pancetta. Once the onion is translucent, add the beans and red paper flakes. You'll want to add the pepper flakes liberally since the amatriciana is spicy. Cook for 2 minutes more. Then add the sauce and heat until warmed through. Add the sauce to your drained pasta in the pot.
Seriously. 20 minutes. Including water boiling and chopping time. If you wanted to make this into a soup, you could use a shorter pasta like macaroni, and add 2 cups of chicken broth to the sauce. (Still cook and keep your noodles separate to prevent the pasta from soaking up the broth and making mush.)
Since this dish is named after moi, I'll fit the theme by putting up something that is currently getting heavy rotation.
Alton Brown is one of my many cooking mentors. For Christmas this year, my parents gave me one of his cook books, in which he gushes over the baking prowess of one of his culinary team members. The mention came as a footnote for adding rosemary to Monkey Bread. Interesting... You could always buy Alton's book, or look up his recipe for monkey bread elsewhere. Here, we are having a snow storm, so going out for ingredients is not happening. Also, I should warn you that this isn't terribly sweet. (I need a break between Christmas and Valentine's day.)This is what I came up with in my wintery solitude... and ate in my wintery solitude...and it was awesome.
Cinnamon Rosemary Bread Pudding
9 ounces of stale bread cut into 1-inch cubes*
1/4 cup cinnamon chips**
2 cups milk
1/2 cup heavy cream
1/4 cup brown sugar
3 eggs
1 tsp finely chopped fresh rosemary (Or 1/4 tsp if you are using dried)
1/2 tsp ground cinnamon
Optional: 2 tbsp of some sweet liquor like rum, brandy or cinnamon liqueur.
4 tsp sugar for sprinkling on top- ideally sugar in the raw
Grease an 8 inch baking dish. Pile the bread cubes in, and sprinkle chips through out. You'll have to tuck some into the bottom and middle to get even distribution. In a separate bowl, whisk milk, cream, sugar eggs, cinnamon, rosemary, and liquor. Pour liquid over bread cubes and press gently on the pile with the back of a spoon so it all gets absorbed. Let the whole thing soak for about 20 minutes. Preheat your oven to 325 degrees (f) during the soaking period. Just before putting your pudding in the oven, sprinkle the sugar on top. Bake for 40-50 minutes. Let it set up for about 10 minutes before digging in!
* This is equivalent to about 3 ciabatta rolls, which is what I used. You can use anything really, as long as it is enough to generously fill your baking dish. I don't need to say that Wonderbread is not conducive to this recipe...right?
** King Arthur Flour makes some really good ones, but you can also get some at the grocery store, made by Hershey's.
After all the decadent food of the holidays, it's nice to have food that is simply nourishing. This is a twist on my all time favorite meal, fondly known in my family as Tuna Cabbage. According to family lore, it was invented by my grandmother out of necessesity, although I had something VERY similar in Hawaii made with pulled pork instead of canned tuna. At any rate, her kids loved it enough to keep making for their families by choice, rather than necessity, and now it's a bonified family recipe. It has been my experience that the humility and simplicity of Tuna Cabbage is not always as appreciated by people outside my family. For instance, Brad is not really a big fan. My mom always makes it for me when I go home, but sometimes I want to eat it but I can't go home. So, ironically enough, out of necessity, I have dressed this meal up a bit so that I may enjoy it from my own kitchen, from time to time.
Tuna Cabbage 2.0
2 Tuna Steaks
Sesame oil
Kosher or Sea Salt
Pepper
Lemon Juice
1 small to medium head of Napa Cabbage
Soy sauce
2 eggs, beaten
red pepper flakes to taste
Some people are sticklers about having fresh fish, but I find a quality frozen fish works just fine. Either way, set the steaks on your counter as you begin working so they aren't stone cold when you cook them. You'll want to make your rice at this point, for the sake of timing. As my family is of Japanese desent we make sticky rice (technical term, haha!) but you can use whatever you like.
Prepare your Napa Cabbage by pulling the leaves off, cutting off the hub, rinsing them, and shreading them into 1/4 inch strips across the grain. Set it on a towel (paper or otherwise) to dry a bit. In a large pot heat about a 2 tsp of sesame oil, add your cabbage and season with red pepper flakes. Pour the soy sauce about three turns around the edge of the pan. You don't want too much, or it will overwhelm the delicate flavor of the cabbage. Gently fold the cabbage until it cooks down enough to cover and cook for about 5 minutes before pouring the eggs on top, making an even layer on top. Replace the cover, turn the heat to low and move to the tuna.
Place a heavy frying pan (cast iron is really good for this, but Brad and I just use a good quality stainless steel pan) on high heat until a drop of water dances on it for about 10 seconds before evaporating. While it's heating prepare your steak by drizzling a bit of the sesame oil on the steak, and flipping and smearing it on a plate, then flip and smear again. This gets a nice thin and even coating of oil on the fish. Then season liberally with the salt and pepper. When the pan is hot enough, place the steaks on the pan and sear on each side for 2 minutes, spritzing the first side with lemon juice, once you've flipped it over. If you like your fish cooked a little more, take it off the heat and cover loosely with foil and give it another minute on each side.
To serve just make a bed of rice, then put some of the cabbage on top. (Break up the egg layer and give the cabbage a fluff before spooning it out). I cut the steaks in half, so one steak serves 2 people and rest the fish on top of the whole thing. I like to put a bit of the "pot liquor" on top of the whole thing as a sauce before diggin in!
This makes enough for 4 people. If you aren't going to eat it all right away, maybe just cook one tuna steak at each sitting, so that it is fresh. The left overs are easy, just make up the tuna, and reheat the rest!
I've been debating the value of purchasing muffin rings for over a year. I finally got some with my birthday money, and I'm so glad that I did! Most recipes call for white all purpose flour, but that doesn't really fit with the dietary needs of this kitchen. I wouldn't say we actively avoid white flour, but given the choice we ALWAYS pick a more fibrous option. So I came up with a recipe that includes whole grains to beef up the fiber content. Since this is my first go around I didn't use any whole wheat flour, but I think next time I'll give it a try. (and I'll be sure to update!) It's not traditional, but it's tasty and it's good for you!
Before we start, a little bit about the rings: I purchased mine from King Arthur Flour, and got a set of 8, and paid a little over $1 for each ring. Sometimes King Arthur Flour can be expensive, but as a poor grad student, I would say this is a solid buy. If you are using them on a non-stick surface, don't slide the rings around, just place them down, and lift straight up to remove them. When you wash them, don't just set them out do dry, they'll rust. Dry them with a towel, and then put them in a warm oven to dry. Just turn the oven on the lowest temperature setting (maybe 200?) while you wash dishes, put the rings in the oven, and turn the oven off. When it's cooled down completely, your rings should be ready to go.
Multi Grain English Muffins
1 cup milk, microwaved for 2 minutes
1tbsp sugar
1tbsp shortening
1tsp salt
1 packet of instant yeast dissolved in 1/3 cup warm water
2 cups all purpose flour
1/2 cup multi grain hot breakfast cereal (uncooked) *
In your mixing bowl combine milk, sugar, shortening and salt. Stir until the sugar and the salt dissolve. You can try to break up the shortening a little bit, but it won't break up too much. Add the yeast. Then, with your trusty mixing spoon beat in the flour and cereal, sort of smashing the lump of shortening, until it's all blended.
Let the mixture rise for 30 minutes. I put mine on top of the griddle on top of the stove. Since we have a gas oven it stays pretty warm.
If you have an electric griddle preheat it to 300 degrees. If you don't preheat your griddle( a large pan works too, you'll just have to cook fewer muffins at a time) on the stove top on low heat. While your cooking surface is heating up, lightly grease your rings, and set them on the griddle. The dough is sticky, so if you have an ice cream scoop with the spring-loaded scraper, that would be perfect for putting the dough in the rings. Or if you don't have one (like me) Just put two heaping tablespoons scooped out of the spoon with your finger... into the rings and let them cook on one side for 5 minutes. Use tongs to pinch the edge and flip them over and cook for 5 more minutes.
Delicious!
Once they have cooled completely, you can save these in an air tight container on the counter top for the next day, in the fridge for the next 3 days, or in tightly wrapped in cling wrap and foil for the next 3 weeks.
* I use Trader Joe's brand, which includes oats, barley, rye and wheat. I think just quick (not instant) oats would work well here. You might also try a 10 grain mixture like the one offered by Bob's Red Mill.